
How-tos
Recording with a CF recorder
If you have suggestions on how to improve this document, or find mistakes, please send them to ilslabs@nulluu.nl
Introduction
 For research outside the building, we have some solid state recorders available. You can borrow them from the lab technicians in room 0.09. Be aware that you have to reserve a recorder in the reservation system in advance.
A solid state recorder is a audio recording device without tape or other moving parts. The sample is stored digitally on a memory card (just as in digital photo cameras).
Borrowing a CF Recorder
When you borrow a recorder, you get a case containing:
- Marantz PMD671 Portable Solid State Recorder
- Headphone (with a 6,3 mm jack type plug)
- Power supply
- Microphone (with a XLR type connector)
- Marantz PMD671 Users Guide
- USB cable
You’ll probably be asked what kind of audio source you have. For recording a group of people, sitting around a table, you need a omni-directional microphone that picks up sound from all directions. But when you want to make a clear recording of the pronunciation of a certain language, it’s better to use a microphone that only picks up the sound from one direction.
Recording
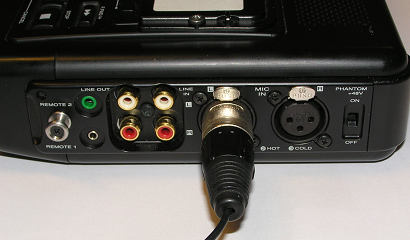
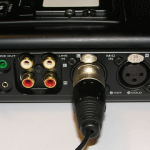 Connect the microphone to the left XLR input of the recorder.
- Check if the PHANTOM +48V switch is in the right position:
Type Internal battery Phantom Power ATR97 Omni-directional Yes OFF Sennheiser ME 64 Cardoid No ON BeyerDynamic MPC 66V Omni-directional No ON - Connect the headphone to the PHONES connector.
- Connect the power supply to the recorder. Since the input voltage must be between 100 and 240 volts, you can use the same power supply everywhere in the world, without adjusting it for other voltages (like 110 volts in the USA).
Batteries
If you need to make recordings on locations where no electricity is available, the PMD671 can operate on 8 standard AA size Alkaline batteries or rechargeable Ni-Cd or Ni-MH batteries. Check the manual to set the battery type. When not set up properly, the battery indicator will not show the appropriate battery status. In case of rechargeable batteries, you need an external battery charger.
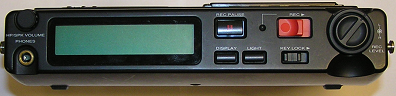
- Switch on the power by sliding the POWER switch in the direction of the arrow.
- Check if you are using the right preset. There are 3 presets available:
Preset 1 Preset 2 Preset 3 Stereo/mono Mono Mono Mono File format Mp3 Wav Wav Sample frequency 44.100 48.000 48.000 Bits per sample – 16 24 Bit rate (kbps) 160 – – Max rec time (hh:mm:ss) 14:13:20 2:57:52 1:59:28
To select one of the presets:
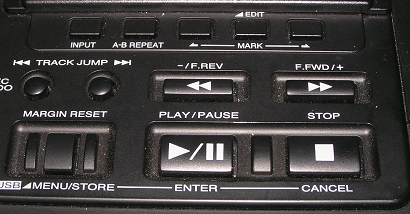
 Press and hold MENU/STORE 2 sec
- Press ENTER
- Choose the desired preset with F.FWD/+ and -/F.REV
- Press ENTER to confirm your choice
- Press MENU/STORE to store your choice and exit Menu mode.
- If you are using a microphone with a battery, switch the microphone on.
- Switch to Recording mode by sliding the REC switch in the direction of the arrow. The red LED will light up to indicate that recording is active.
- Push the REC UNDO button twice to pause recording, since we need to adjust the record level first. The red led will blink while recording is paused.
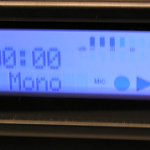
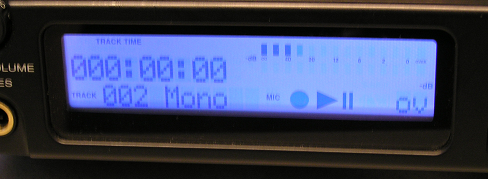
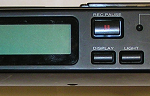 Ask your subject(s) to talk for some moments. Adjust the REC LEVEL knob so that the level indicator on the display never really reaches the end, but approaches it as much as safely possible.
- Adjust the head phone volume and listen if you hear the right things (your subject) and also check if you don’t hear the wrong things (trespassers, traffic, wind, noise, radio)
- You are ready now to start recording. When you and your subject are ready for it, slide the REC switch again to start recording.
 When you are ready, press the STOP button.
- to unplug the microphone, push the small PUSH lever to release the connector.
- if you are using a microphone with a battery, don’t forget to switch the microphone off.
Play back your recording
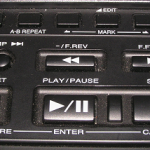
To play back your recording, first select the desired track using the TRACK JUMP buttons. Then press PLAY/PAUSE. During playback, you can also use the TRACK JUMP buttons.
Erase your recording
During recording, press and release twice the REC UNDO button to erase the recording and pause recording at the beginning of the track.
To erase a track
- From stop, press and hold the MARK/EDIT button for about 2 seconds to enter Edit mode. ‘Renumber’ is flashing in the display.
- While Renumber is flashing (3 seconds) press and release the MARK/EDIT button again. ‘TrkERASE’ is flashing in the display.
- While TrkERASE is flashing (3 seconds) press and release the ENTER button. The track number is flashing in the ERASE display.
- Press the F.FWD/+ button or the -/F.REV button to select the track number you want to erase.
- While the track to be erased is flashing (3 seconds), press and release the ENTER button.
- Press the STOP button to exit.
Transfer your recording to a computer
You can connect the recorder to every computer that has a USB interface. The recorder will behave as a kind of memorystick. You can copy the .wav and .mp3 files to your computer. (Don’t forget to make a backup copy, for example on a dvd or cd-rom!)
To connect the computer to the recorder, follow these steps:
- Take the USB cable and connect it to the recorder and the computer, while the recorder is switched off.
- Switch on the recorder, while pressing the MENU/STORE button. ‘USB Online’ appears on the display. Within a few seconds Windows will probably ask you what to do with the device.
Please remove your audio files after you copied them and before you return the recorder to room 0.09.